
MileSplit Live Field is free to use and allows officials to enter field-event results from an internet-connected device.
The Field App can send results back to MileSplit Live, where timers can create LFF files for scoring in supported meet management software.
Important: Always keep a paper copy of field results as a backup.
Part 1: Set up MileSplit Live
Update MileSplit Live
Use MileSplit Live v1.0.86 or later.
This version includes support for:
- Sending entries to the Field App
- Receiving field-event results
- Creating LFF files for use with meet management software
Select MileSplit Live Field
- Open MileSplit Live.
- Select your meet.
- Select MileSplit Live Field from the data source dropdown.
- Browse to the folder where you want the .LFF files saved.
Use the same folder configured as the FieldLynx interface folder in your meet management software.
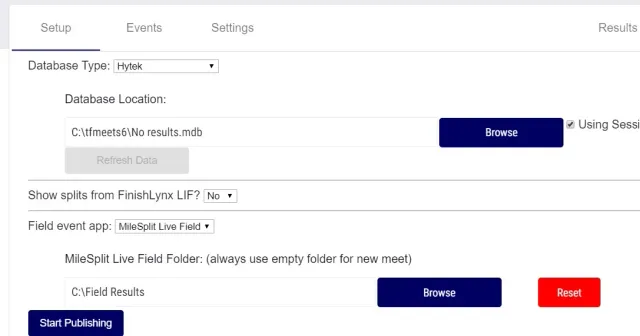
- Select Start Publishing.
If officials will access the Field App using their own devices, create an access code using the steps below.
Create Field App access for another device
- In MileSplit Live, find Quick Links.
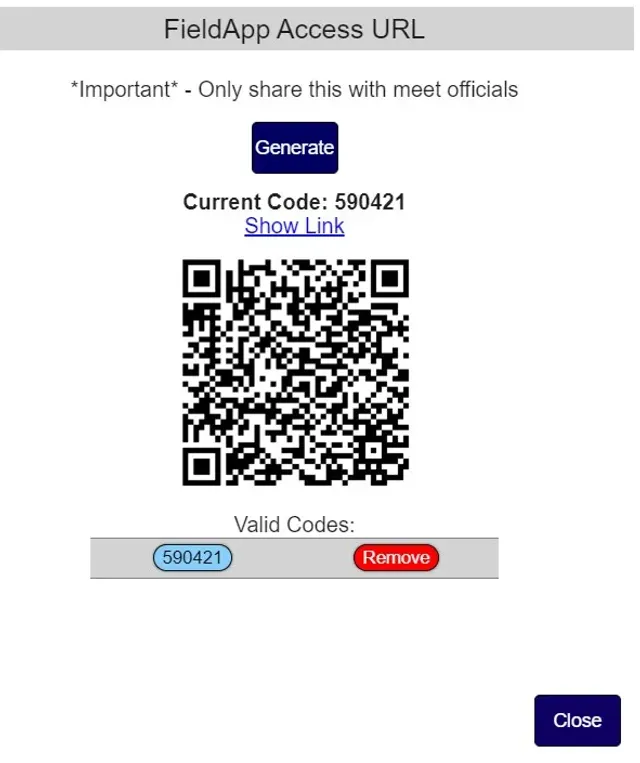
- Select Create Field App Access Code.
- Select Generate to create a QR code.
- Give the QR code to the field official who needs access.
You can also select Show Link to copy the full Field App URL and send it directly to the official.
Create or remove access codes as needed to manage which devices can access the meet.
Part 2: Open the Field App
On an internet-connected device with a modern browser, go to:
https://live-field.milesplit.com
If you are starting a new meet, clear any previous meet data using the option at the top of the page.
If you are the timer
Enter your MileSplit login information to load your timing schedule.
Then:
- Select your meet.
- Select the field event you want to manage.
Events categorized as field events will appear in the event list.
If you are using an access code
Scan the QR code provided by the timer or open the access URL.
A successful access code will take you directly to the available events.
Part 3: Configure horizontal events
For a horizontal event, select the appropriate scoring format from the setup screen.
Currently supported formats are:
- Finals
- Prelims/Finals
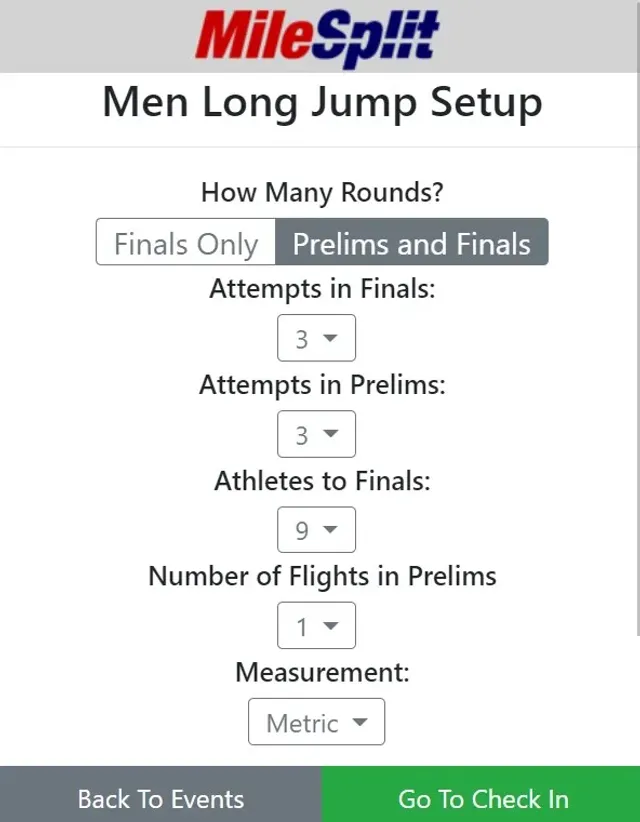
Review the event settings before beginning competition.
Part 4: Configure vertical events
For a vertical event:
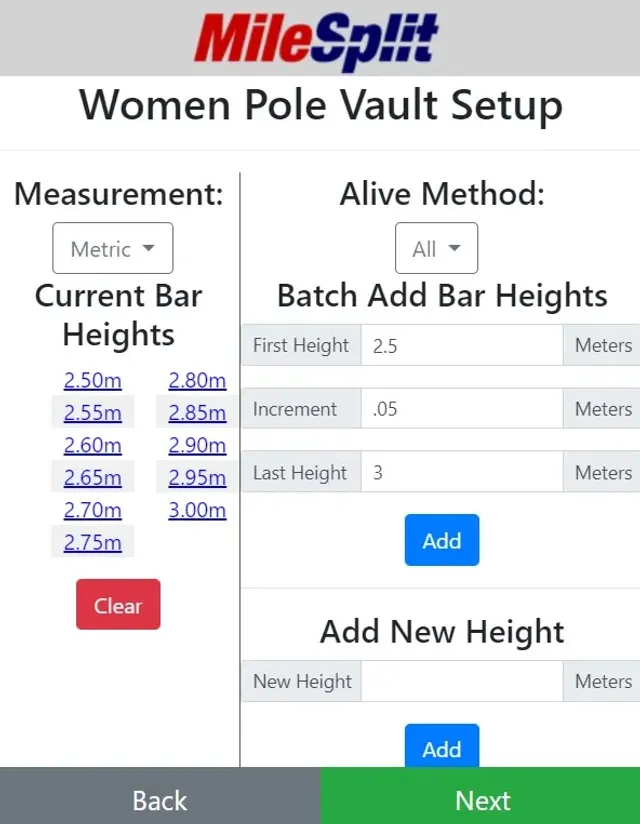
- Select the appropriate measurement type.
- Enter the bar heights.
- Set the number of Alive athletes who should be active at one time.
To add multiple bar heights quickly, use the batch-add option.
Enter:
- Starting height
- Increment
- Ending height
The Field App will create the bar heights within that range.
You can add multiple batches when needed.
Part 5: Check in athletes
Before scoring:
- Open Check In.
- Select the appropriate round.
- Select the appropriate flight.
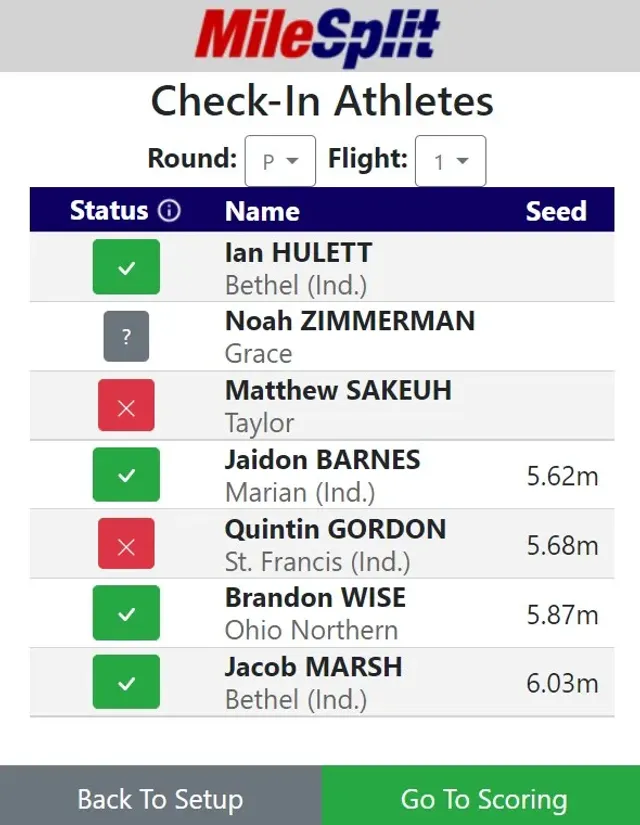
- Review each athlete's status.
Athletes are checked in by default and shown in green.
Available statuses include:
- Green: Checked in
- Red: Out
- Gray: Unknown
The Field App treats Out and Unknown the same functionally.
For Prelims/Finals events, athletes will not appear in the final until the final has been created. Athletes included in the final are checked in by default.
Athlete substitutions and additions are not currently available through the Field App.
Part 6: Score the event
Open Scoring.
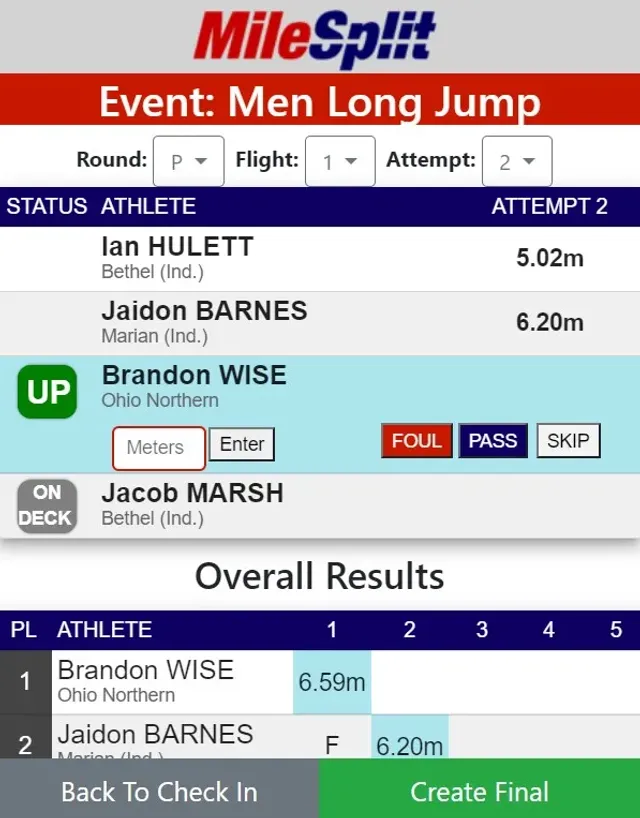
The athlete order follows the order provided by the scoring software.
The Field App uses indicators including:
- UP
- ON DECK
- ON HOLD
Enter metric marks
Enter metric marks using:
xx.xx
The decimal point is optional when you enter two digits after the decimal.
For example:
2785 = 27.85
Select the submission button or press Enter to record the mark.
Enter English measurements
Enter the feet measurement first.
Use the - key to move automatically to the inches field.
The decimal point is optional when two decimal digits are entered.
For example:
950 = 9.50 inches
Scoring buttons
FOUL
For horizontal events:
- Records F for the current attempt.
- Completes the current attempt.
For vertical events:
- Records X for the current attempt.
- After three consecutive fouls, the athlete is removed from the competition.
PASS
Records P for the current attempt and completes that attempt.
SKIP
Moves the athlete to the end of the current order without affecting the attempt.
MAKE
Available for vertical events only.
MAKE:
- Records O for the current attempt.
- Records the height as successful.
- Advances the athlete to the next height.
Part 7: Create the final
For a Prelims/Finals event, select Create Final after preliminary competition is complete.
The final can be recreated if you need to change the competitors or event settings.
Part 8: Submit the results
After competition is complete:
- Select Submit Results.
- Wait for confirmation that the final results successfully reached MileSplit Live.
- Have the timer verify that an LFF file can be created.
- Close out the event after the results have been confirmed.
Part 9: Create the LFF file
After the event has successfully sent its final results:
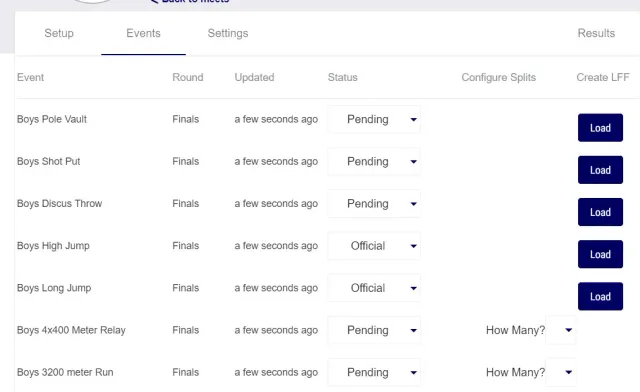
- Open the Events tab in MileSplit Live.
- Find the completed event.
- Select Load next to that event.
MileSplit Live will create an LFF file for the event in the field-event folder you selected during setup.
Part 10: Load results into your meet management software
The completed LFF can be used to bring field-event results into Hy-Tek or MeetPro.
Make sure your FieldLynx interface is configured to use the same folder where MileSplit Live creates the LFF files.
Then use the appropriate option in your meet management software:
- Hy-Tek: Select Get Marks
- MeetPro: Select Get Event Results
This loads the final field-event results from the LFF into your meet database.
Before closing the event
Confirm that:
- Final results were submitted successfully from the Field App.
- MileSplit Live received the results.
- The LFF file was created.
- Your meet management software successfully loaded the results.
- Your paper backup matches the final recorded results.