Easy Meet Manager
Easy Meet Manager (EMM) setup requires three parts to get started: - Start the native Windows FTP Server and configure a local FTP directory - Configure EMM to send files to the FTP directory.
- Configure MileSplit Live to read results files from the FTP directory. Parts 2 and 3 will need to be done for each meet.
Start local Windows FTP Server (Initial setup only)
1. Create a new folder for storing live results files in the C:\ drive. For each meet you will create a new folder within this folder to store the files from Easy Meet Manager.

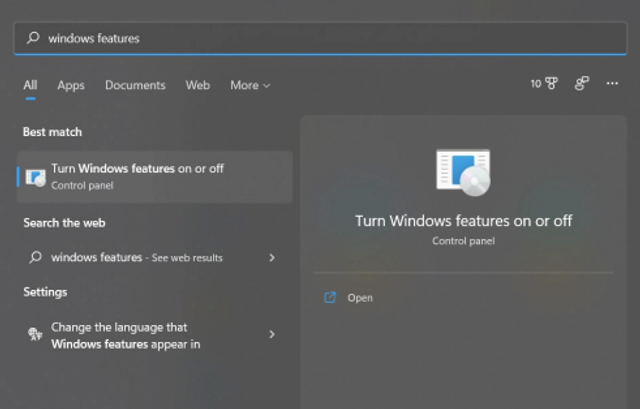
2. Enable Internet Information Services (IIS) feature by searching for Windows Features or selecting Turn Windows Features On or Off from the Control Panel.
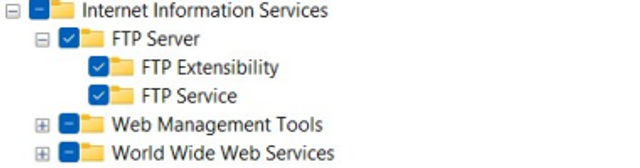
3. Click the checkbox next to Internet Information Services, then expand to FTP Server. Click this checkbox as well.
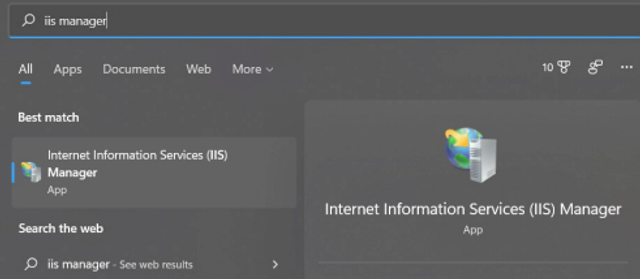
4. Run IIS Manager.
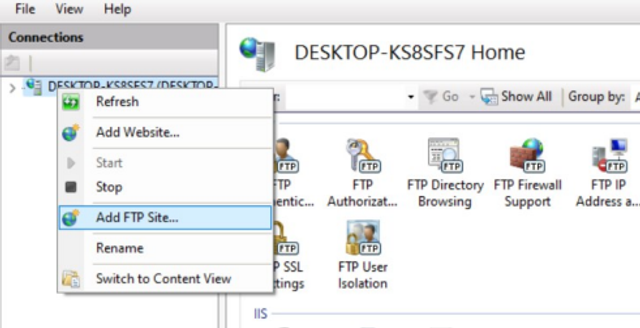
5. Right-click on the computer name and click Add FTP Site.
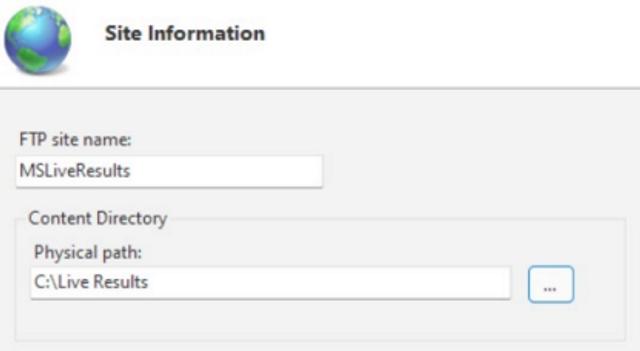
6. Add an FTP site name, such as MSLiveResults, and browse to the directory you created in step 1, then click Next.
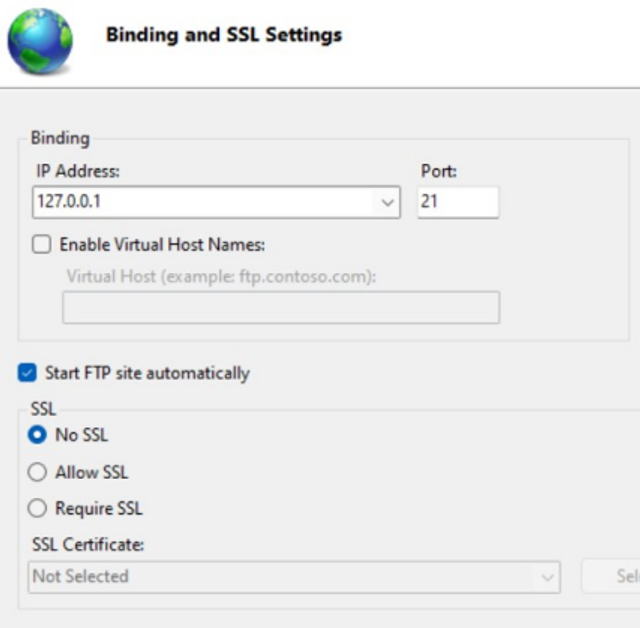
7. Change the IP address to 127.0.0.1 and select No SSL. Click Next.
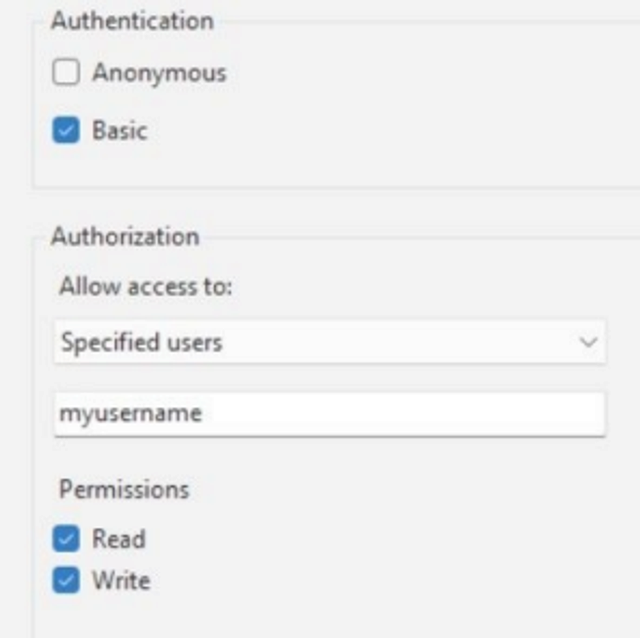
8. Select the Authentication checkbox to Basic. Change the Authorization dropdown to Specified Users and enter your computer username in the text box. Select the Permissions checkboxes next to Read and Write. Click Finish.
Configure EMM for Live Results
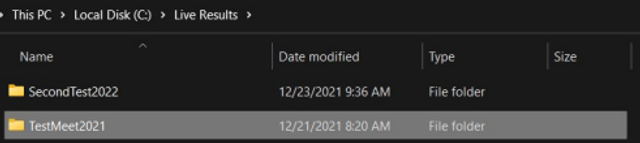
1. Create a new folder in your FTP Directory (C:\Live Results) for the meet you are publishing. Be sure there are no spaces in the name.
2. Open Easy Meet Manager and enter the settings that match your FTP configuration. The password is the same as your computer login password. The directory should be the name of the folder you created in step 1.
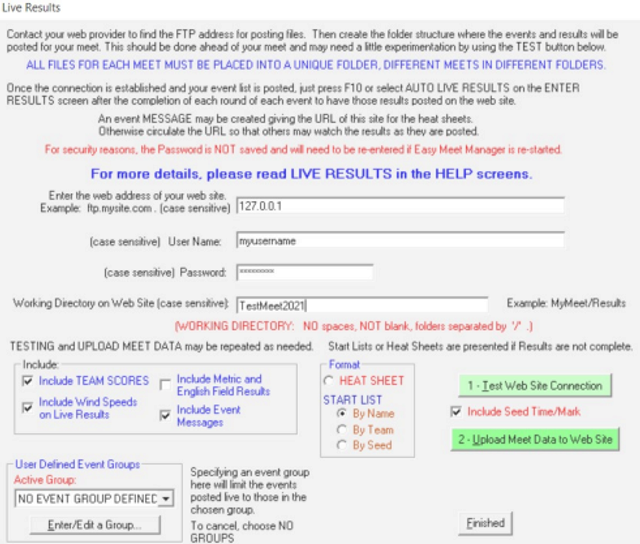
3. Click Upload Meet Data to Web Site. If files don't upload, double-check the FTP server configuration and try again.
4. When you start entering results, check the box next to Auto Upload Live Result

Configure MS Live to Publish Results
1. Open MS Live and select your meet. Change the data source to Easy Meet Manager and browse to the meet folder you created in the EMM setup steps.

2. Click Start Publishing. You're done!